Lido x SSV Network - 4th Testnet SDVTM Guide
Note: This is a permissioned testnet and the guide is part of a larger series of guides, but covers most of the basic steps related to the node operator onboarding flow. During the initial phase, the group of people wanting to form a cluster should choose a cluster coordinator – this should be someone technically adept and experienced in setting up a SAFE Multisig and SSV Operator cluster!
Lido x SSV Network Node Setup
Step 1: Log into Your Server
To begin setting up your node server with Stereum, start by logging into your server. Enter the server's IP address, username, and password, then proceed to log in. This step is critical for establishing a secure connection to your server where the node will be installed.
Step 2: One-Click Installation
Once logged in, look for the "One Click Installation" option, which is recommended for its simplicity and automated setup process. Select this to initiate the installation of your node with minimal hassle.
Step 3: Select Network and Module
In the one-click installation section, select the "Lido x SSV SDVTM" option to participate as a Node operator for Lido. From the network dropdown, pick an Ethereum testnet like Holesky.
Step 4: Set Data Path
Ensure you set the appropriate data path for your server by selecting the right storage volume. This step affects your node's performance and stability. For services, Geth is common for execution, and for consensus, any client works well. Set the installation directory, usually /opt/stereum, to keep your services well-organized for easy management.
Step 5: Set Synchronization Method�
The next step involves setting the synchronization method for your node clients. The recommended 'Checkpoint Sync' method allows quicker synchronization with the blockchain by starting from a known good state. Choose a trusted source for your checkpoint, which will influence the integrity and reliability of your node's data.
Step 6: Confirm Installation Paths
Finally, confirm the installation paths for each component you’re setting up on your server. This summary screen lists all the chosen services with their respective categories and installation paths, ensuring you have a clear overview of where each service will reside on the server. It’s important to verify that each path is correct to prevent any future operational issues.
Step 7: Complete Installation
Continue & wait for the installation to complete. This process might take some time depending on the server and network conditions.
Step 8: Monitor Client Status
After completing the initial setup, you will be directed to the node page. Here, monitor the status indicators next to each client, which will initially appear as small red dots. These dots will turn green once the clients are successfully turned on �– the only exception will be the SSV Network Service as well as the SSV DKG Service. When this happens, proceed by clicking on the "Control" tab to manage your settings further.
Step 9: Confirm Change Log Settings
As we are tracking missed block proposals, we need to increase the duration that SSV Nodes store their logs. In your SSV Node Config, accessible by opening the SSV Config in the settings of the SSV service, check that the LogFileBackups option is set to "28."
Step 10: Synchronization Status
On the "Control" page, keep an eye on the synchronization status of both blockchain clients. Typically, the Consensus Client synchronization completes before the Execution Client's process starts. It's important to allow both clients to fully synchronize to ensure your node operates correctly within the network.
SSV Network Operator Setup
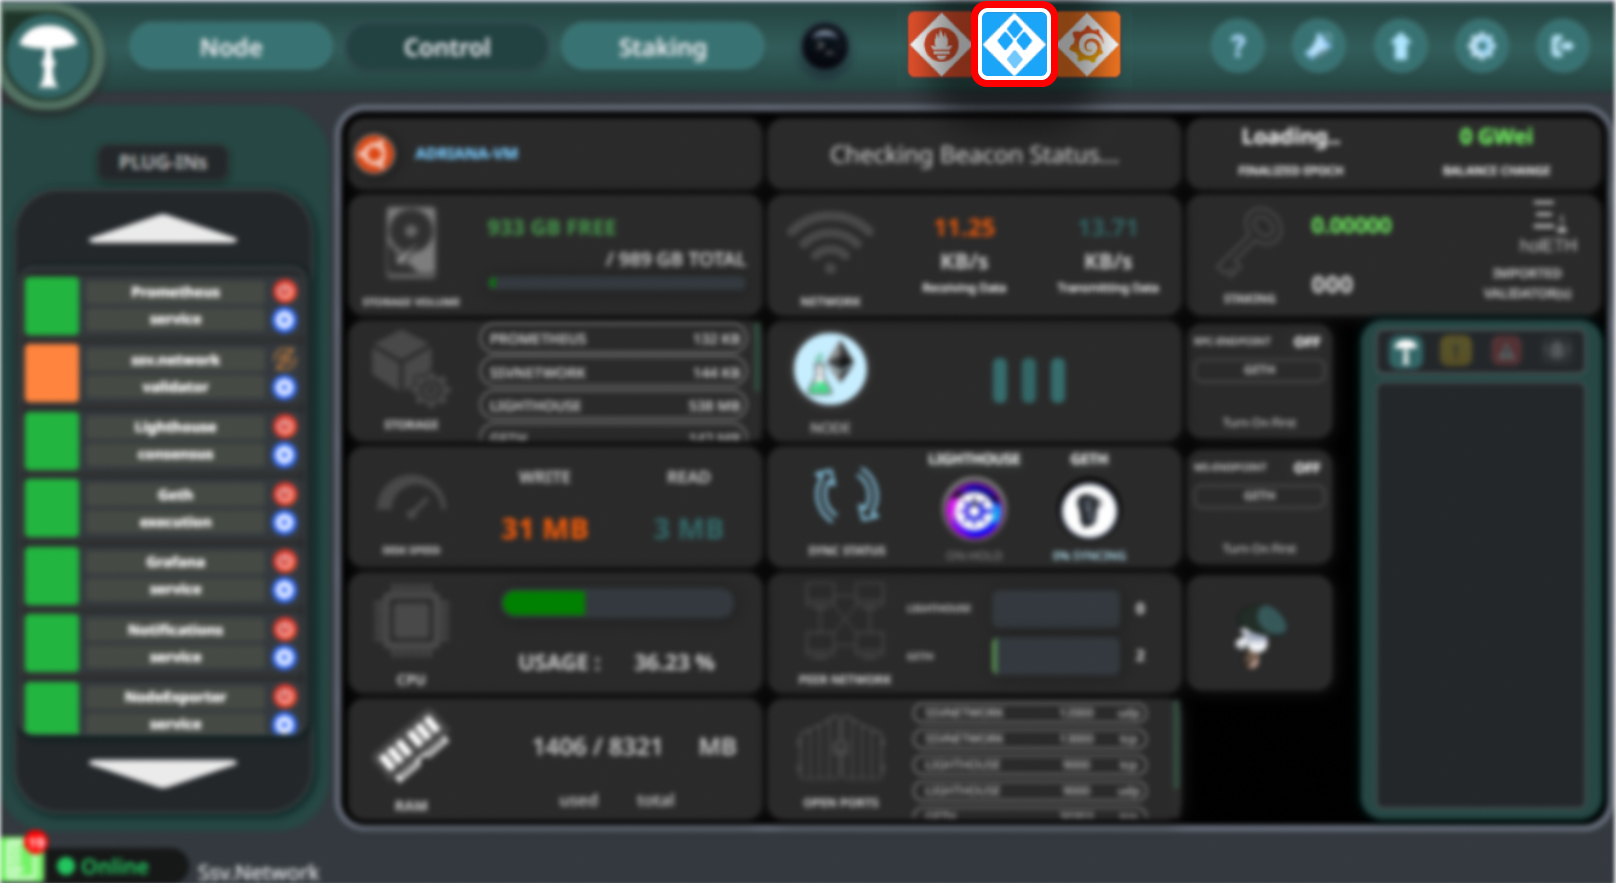
Step 11: Access SSV Network Features
Click on the SSV Network icon located at the top of the interface to access specific network features.
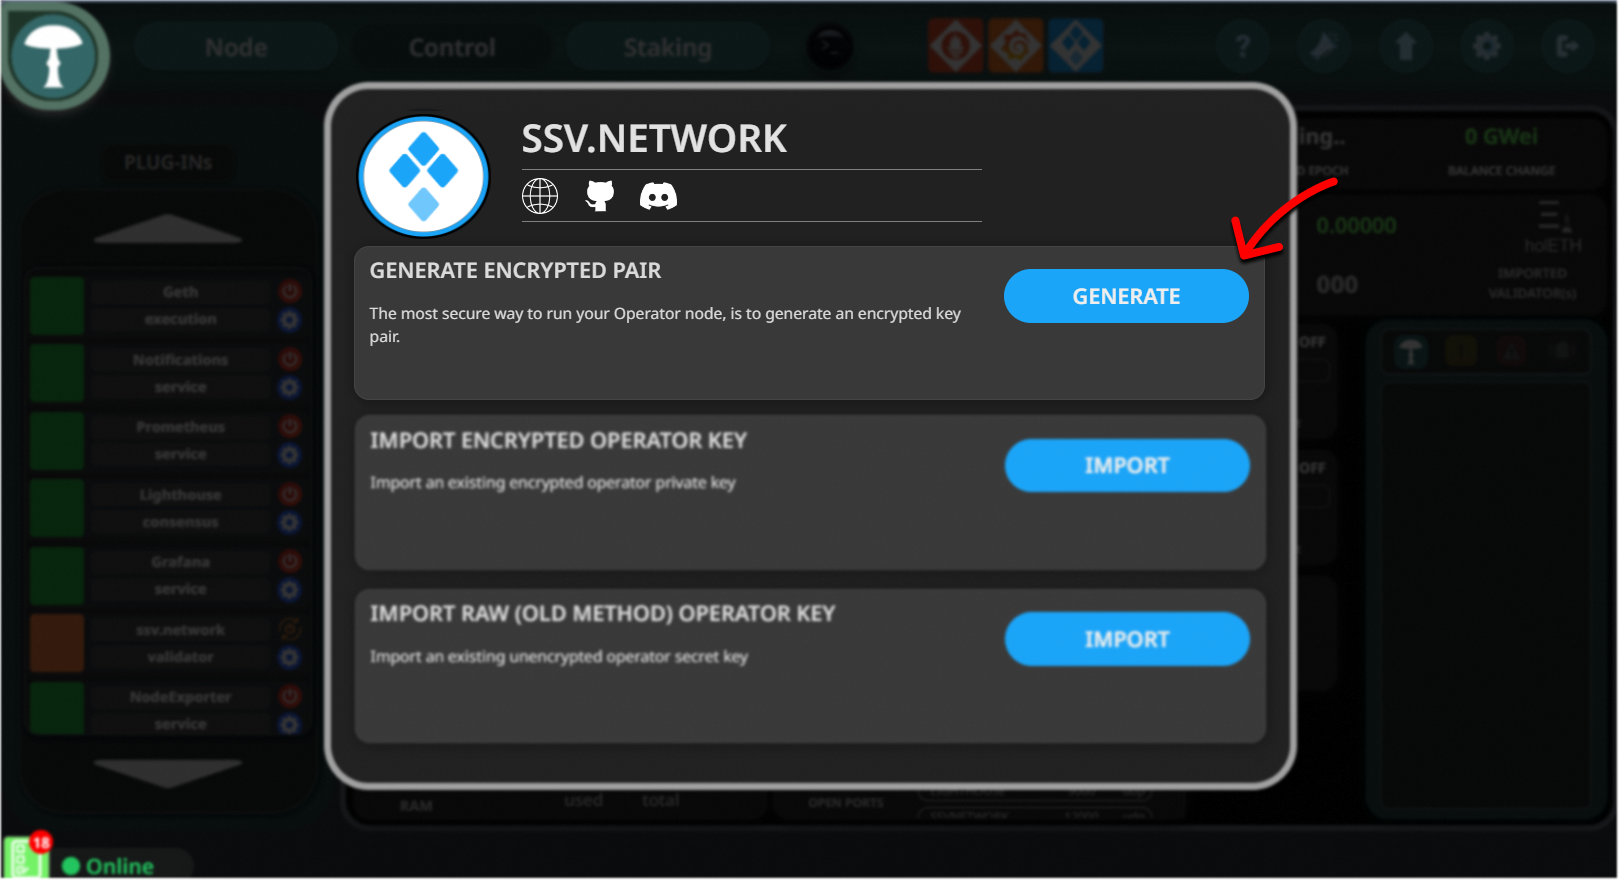
Step 12: Generate Encrypted Operator Key Pair
In the SSV Network options, click "Generate" on the "Generate Encrypted Pair" section to secure your operator node with an encrypted key pair.
Step 13: Set Operator Password
Enter a strong password to encrypt your operator key pair, then click "Generate". Download the backup of the encryption details for safekeeping.

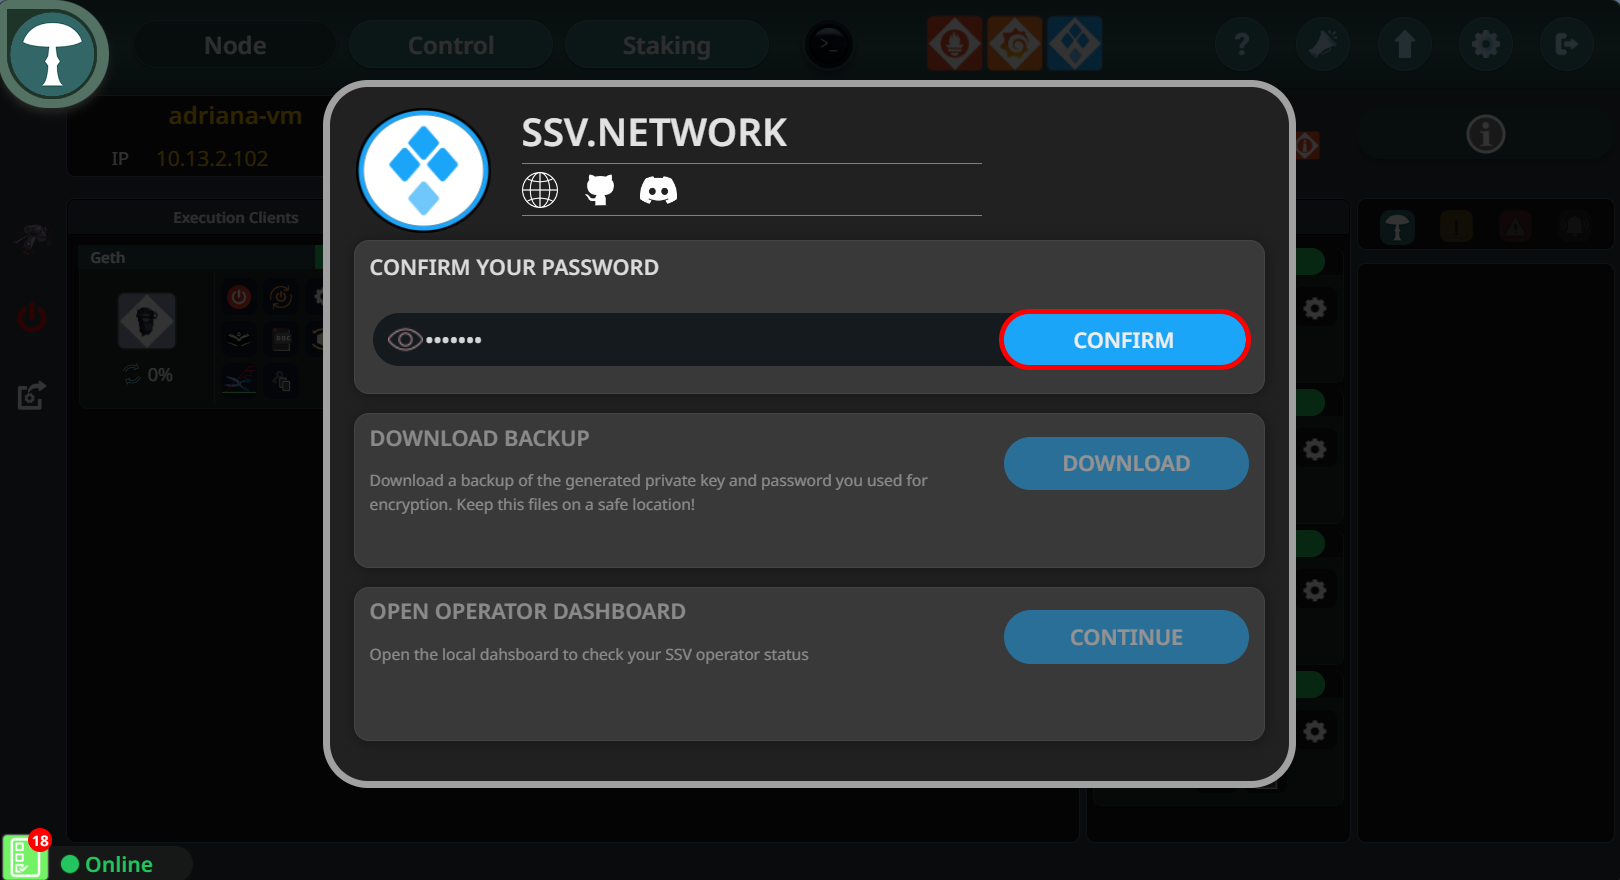
Step 14: Enter and Confirm Your Password
After setting your password for the encrypted operator key, click "Confirm" to secure the encryption settings and safeguard your key.
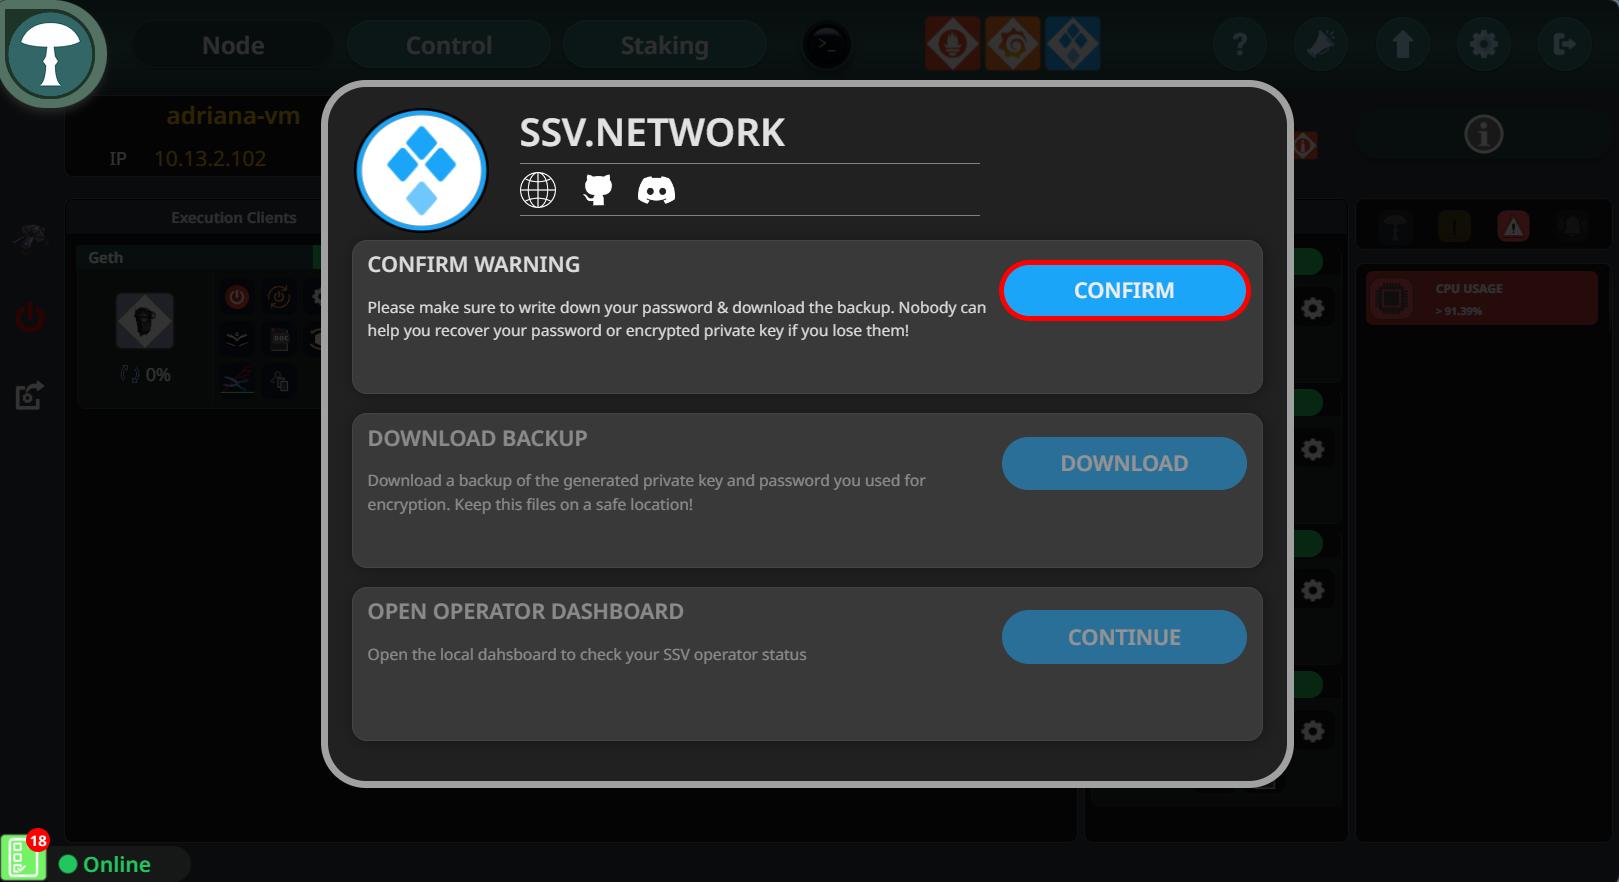
Step 15: Confirm Warning
Acknowledge the warning by clicking "Confirm" to ensure that you have noted your password and understand the importance of keeping your backup secure.
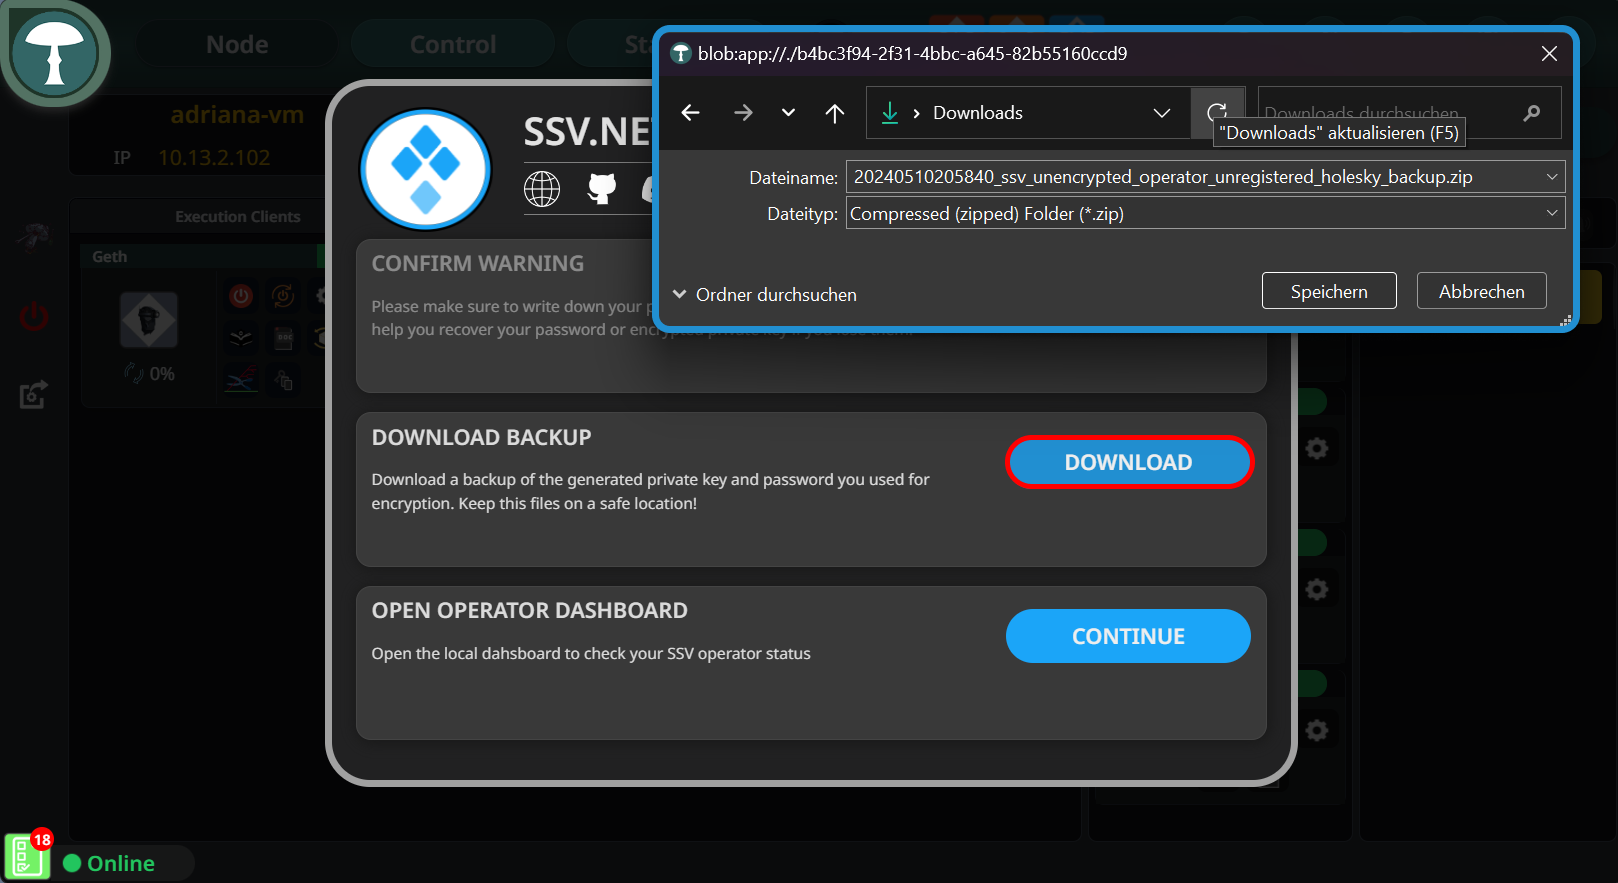
Step 16: Download Backup
Download a backup of the generated private key and password you used for encryption. This file should be kept in a safe location as it is critical for recovery and security.
Step 17: Join as Operator
Once on the SSV Network website, click the "Join As Operator" button to participate as an operator, which involves managing validators and contributing to network operations.

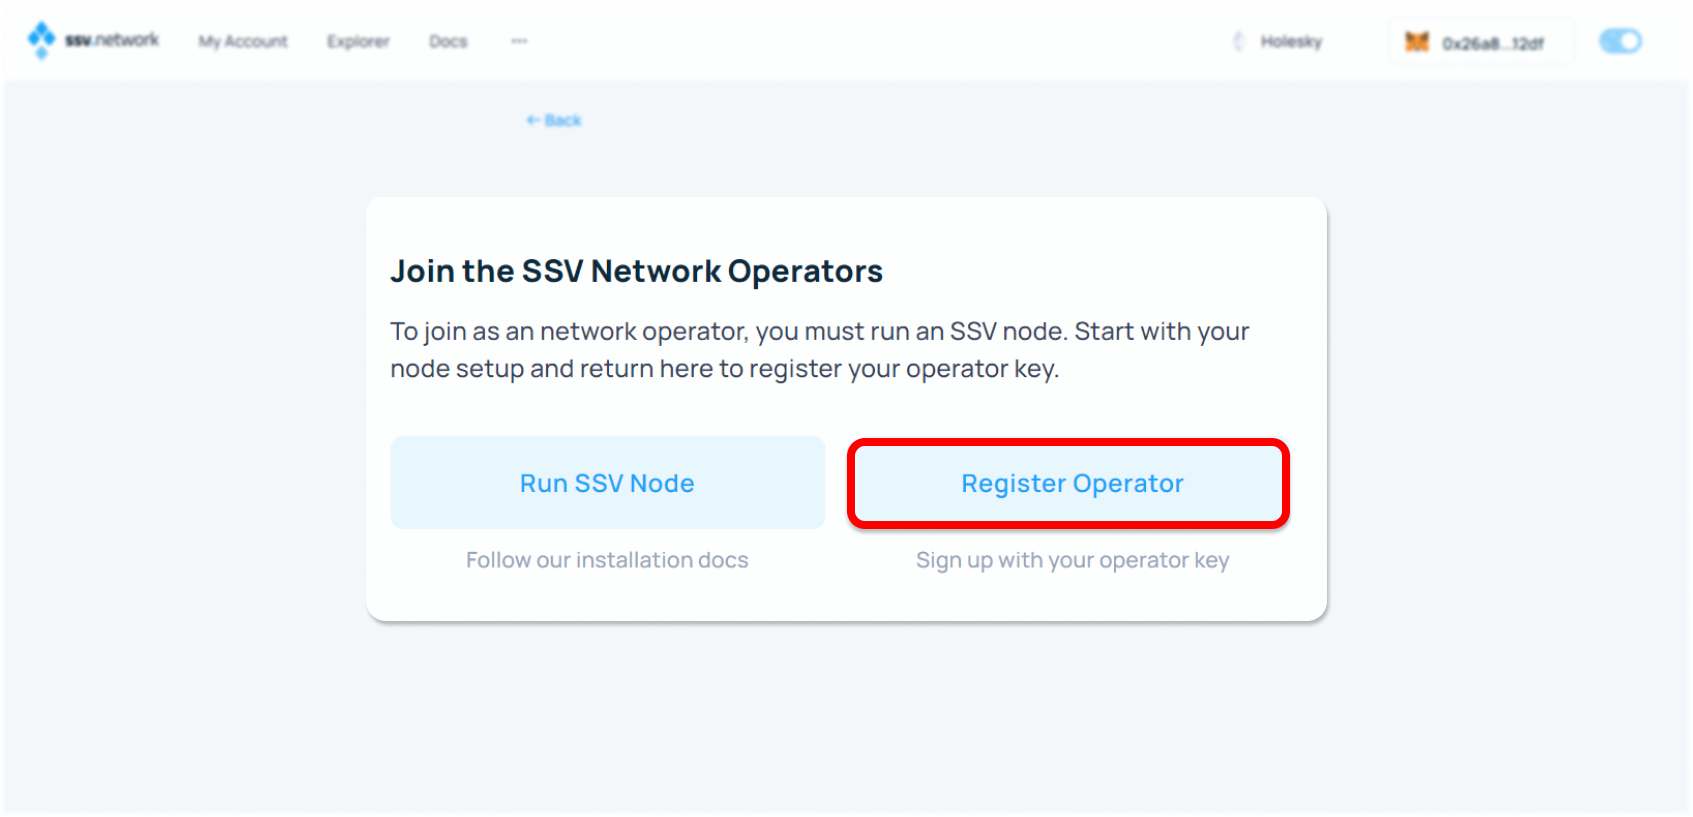
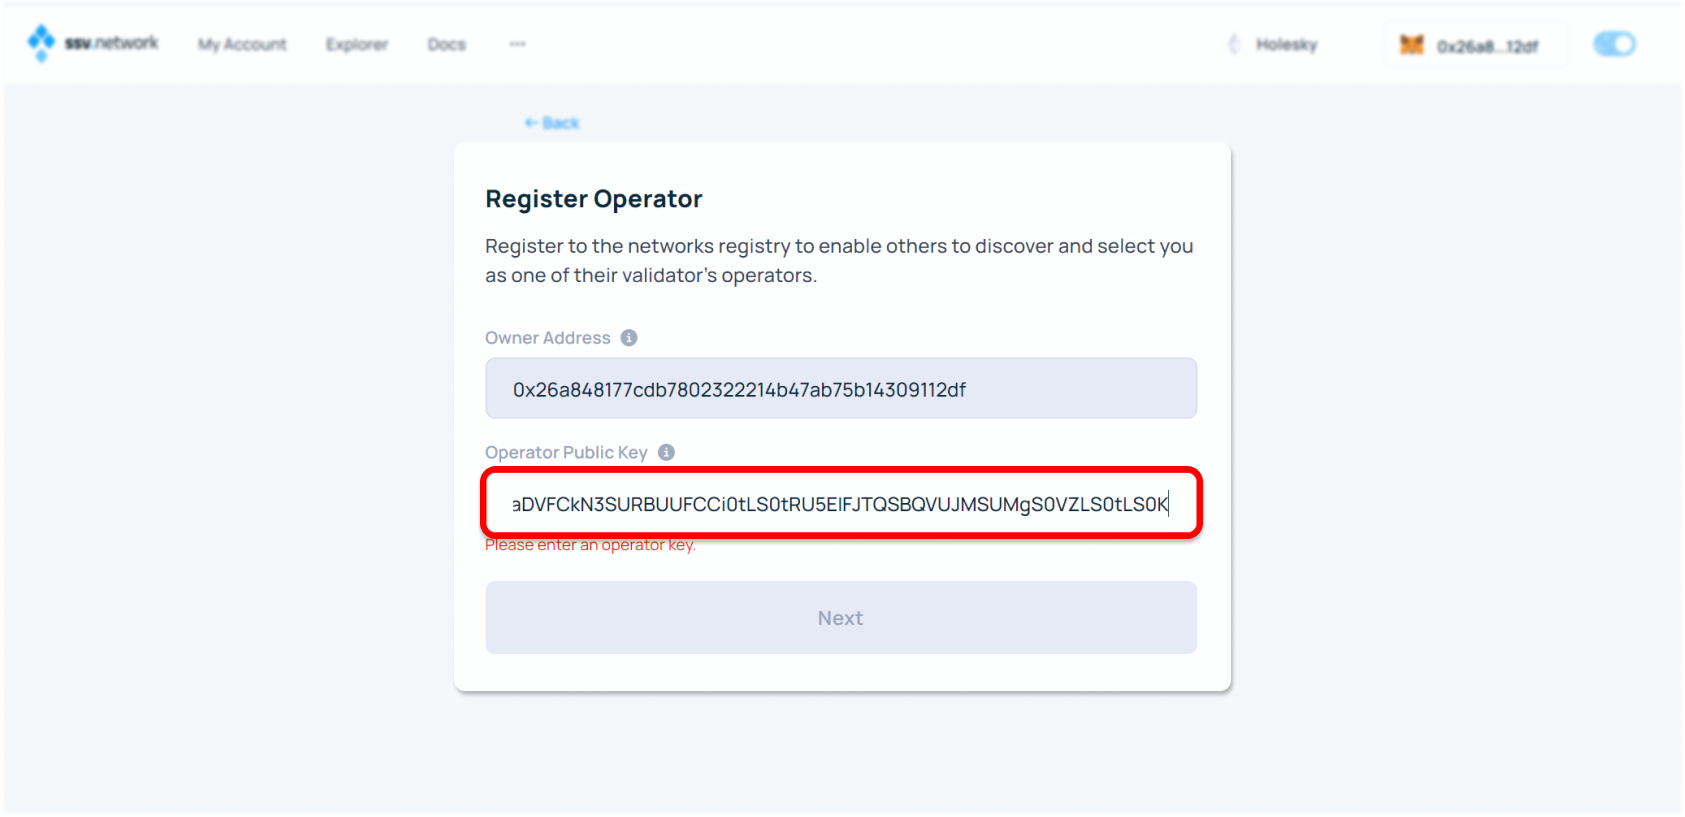
Step 18: Register as an Operator
After clicking "Join As Operator", select "Register Operator" to proceed with the registration process. This involves providing necessary details and your operator key to officially register as an operator on the network.
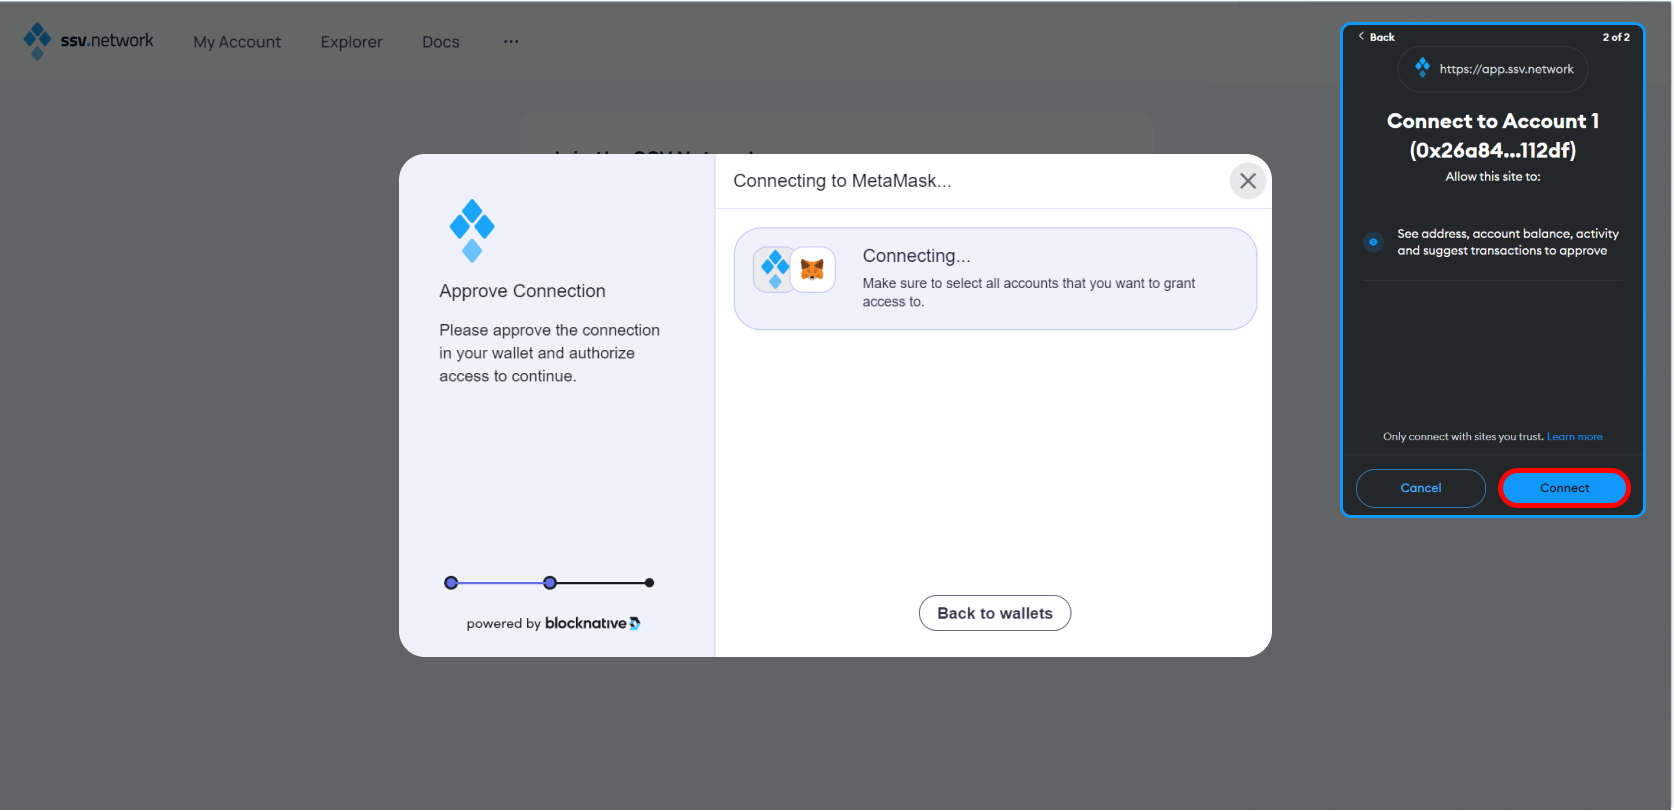
Step 19: Approve Connection
On the SSV Network site, approve the connection request, which allows the site to interact with your digital wallet (for example MetaMask) for necessary transactions and authorizations.
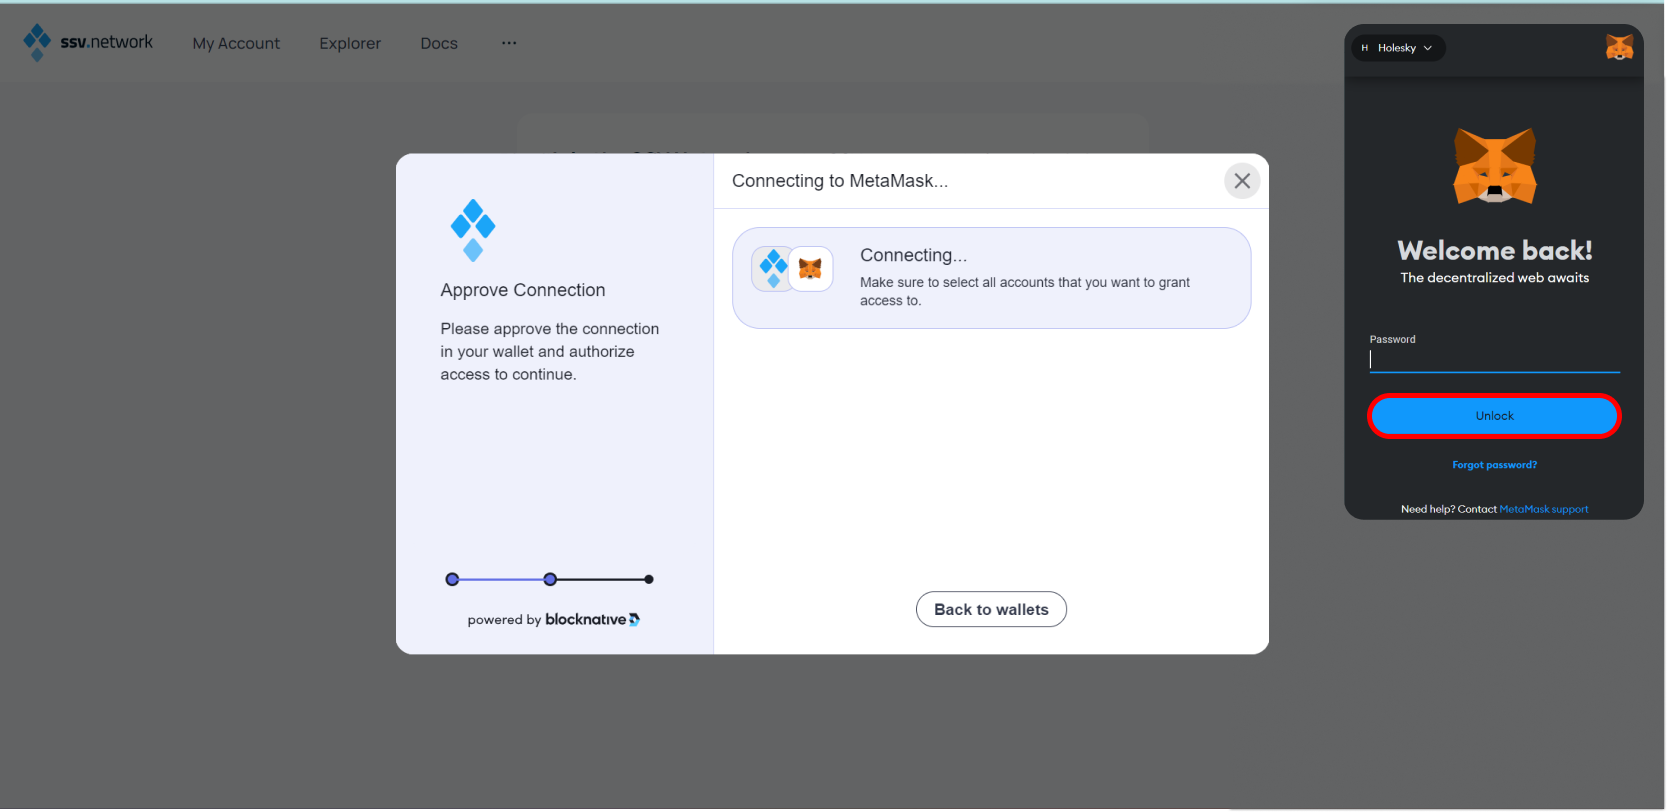
Step 20: Unlock Your Ethereum Wallet
Unlock the Ethereum wallet of your choice by entering your password to authorize further operations and validate your identity as part of the operator registration process.
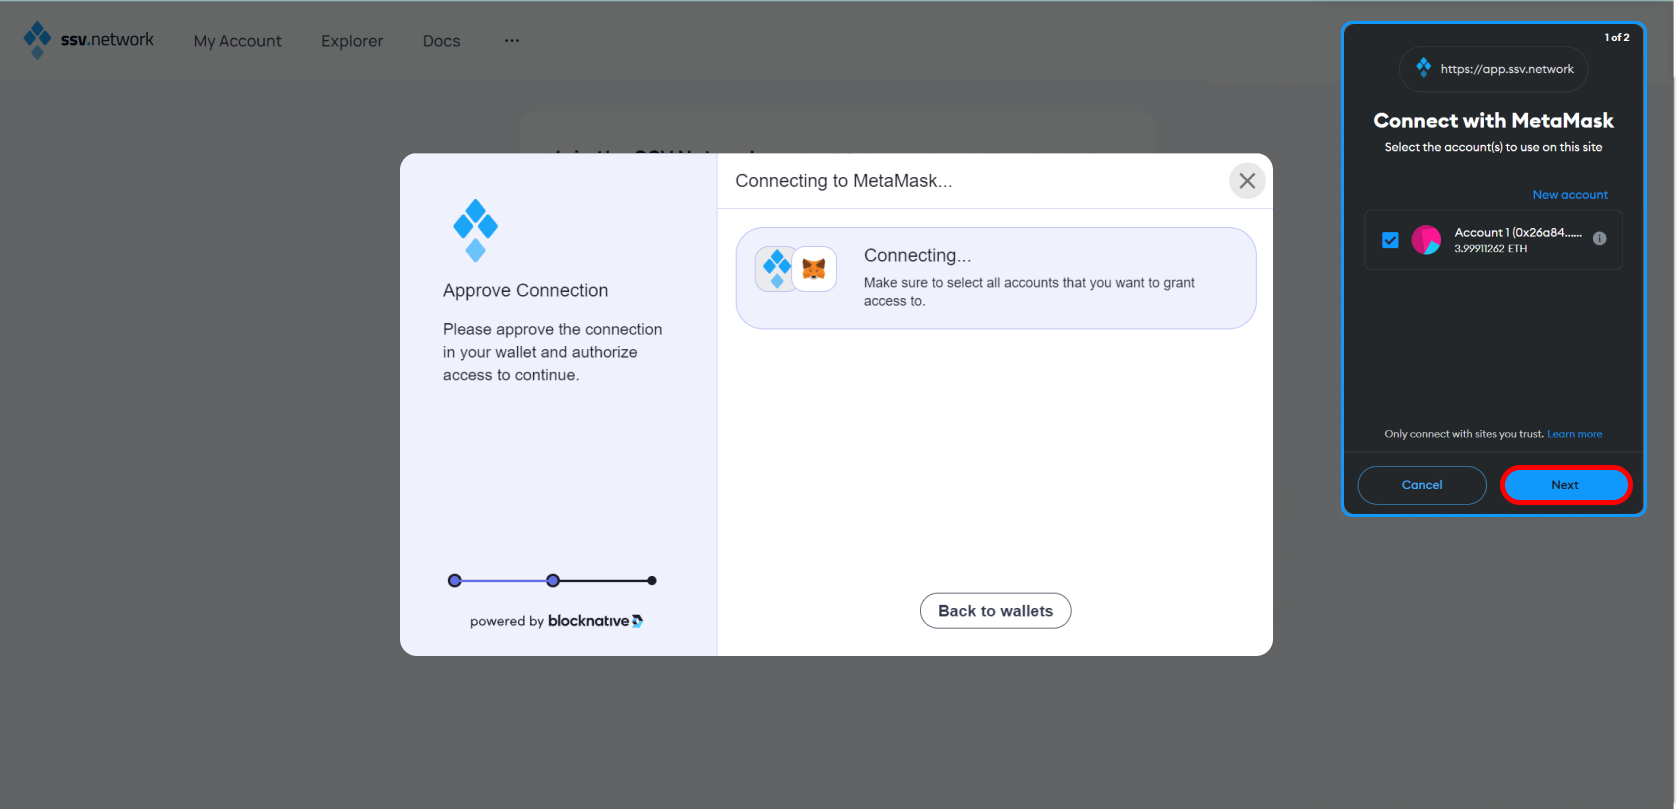
Step 21: Connect to Your Ethereum Wallet
Finally, in your Ethereum wallet (for example, MetaMask), select the specific account you wish to use for the SSV Network operations and click "Connect" to establish the connection and complete the setup.
Step 22: Paste Your Public Operator Key
Copy your Public Operator Key from the Stereum app and paste it into the field shown in your browser. This key allows you to be uniquely identified within the network, enabling other validators to select you as their operator.
Step 23: Set Operator Fee
For the annual fee in SSV tokens, set them to zero.
Step 24: Confirm Operator Fee and Details
After setting your fee, you will see a summary of the transaction details. Verify the information, especially the operator key and the annual fee, then click "Register Operator" to proceed.
Step 25: Confirm Transaction in Ethereum Wallet
A confirmation request will appear in your Ethereum wallet of choice, for example, MetaMask. Review the transaction details, ensuring the fee and recipient details are correct, then confirm the transaction.
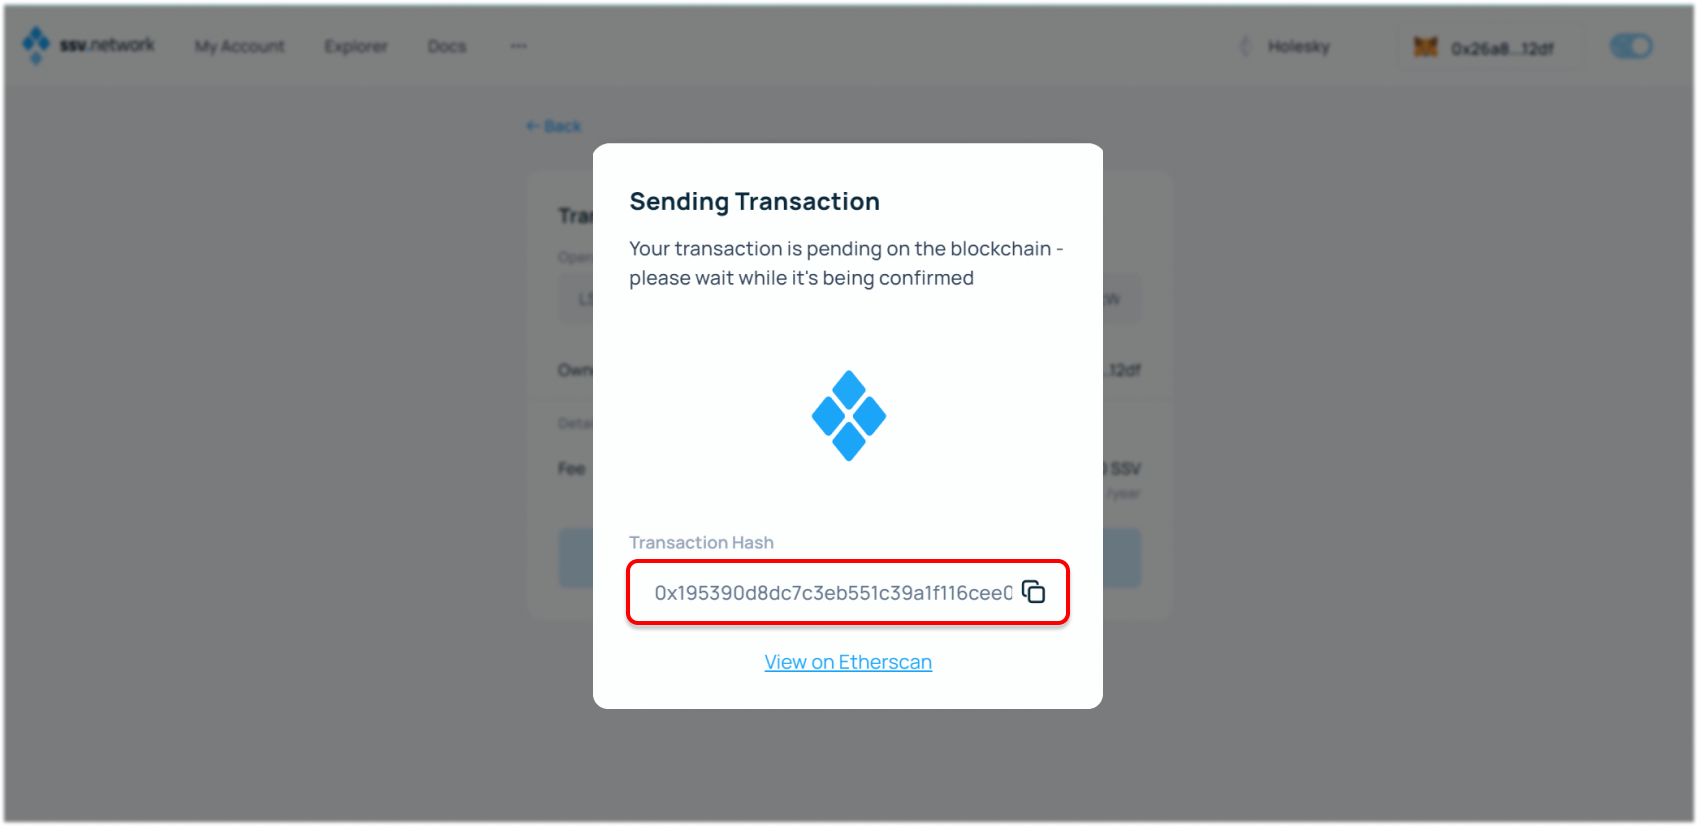
Step 26: Transaction Confirmed
Once confirmed, you will see a transaction hash. You can click on this hash to view the transaction details on Etherscan or another blockchain explorer.
Permissioned Operator Configuration
Step 27: Operator Details Screen
Return to the SSV Network WebApp. If you aren't already there, browse to the My Account page of the SSV Network WebApp. Select the Operator you want to update from the Operator Dashboard and click it to visit the Operator Detail Screen.
Step 28: Access the Access Settings Options
On the Operator Details screen, click on the three vertical dots on the top-right corner, from the dropdown, choose the Access Settings option. In the following screen, you will see options to change the status of your operator, add authorized addresses, and set an external whitelisting contract to manage these addresses.
Step 29: Change Operator to Private
Change the status of your operator to private, start by clicking on the Operator Status option. You will be led to the next modal. After clicking Switch to Private, you will be prompted to sign a transaction with your Web3 wallet. Once signed and validated by the network, the settings will be live.
Step 30: Set Authorized Addresses
Next, you will have to set up the authorized addresses. To do this, use the SAFE multi-sig address of the clusters you are part of. If you are part of multiple clusters, you can add all of them to this list.
SSV DKG
Step 31: SSV DKG Service Configuration
Return to Stereum. Open the Expert Mode in the settings of the SSV DKG service. Enter the Operator ID in the associated configuration line.
Step 32: Turn on SSV DKG Service
Confirm and restart. Please note that in order to participate in the DKG ceremony, it is crucial to keep the ssv-dkg client online at all times. You may turn it off after the ceremonies have concluded, but you must keep the artifacts.
Step 33: Verify SSV DKG Service Accessibility
Verify that your SSV DKG service is accessible from the outside: https://www.yougetsignal.com/tools/open-ports/. Enter the IP of the machine running ssv-dkg (if different from the one running the browser) and select the port used in the operator.yaml config file (default: 3030).
Step 34: Communicate Operator ID to Cluster
At this stage, you are basically done with Setup Onboarding flow. Make sure to communicate back your operator ID to your cluster within your dedicated Discord group.
Step 35: Wait to be Added to the Node Registry
You are nearly all good to go - with this, you have reached the confirmation step! The rest of the steps are outlined in the provided documentation by Lido and require further confirmation by their team before advancing (at least at this stage). Please make sure to keep your SSV DKG Service online at least until the DKG ceremony initiated by the Cluster leader has ended.